If you’re looking to give away a sample pack or a free eBook to your customers, there are a couple f popular methods to do this. Learn how below.
Method 1 – Using a free Shopify product
This method works by creating a free Shopify product and allowing users to go through the checkout process and get a free digital download after checkout.
What do I need?
- A Shopify store
- Fileflare Shopify app (any plan)
Video walkthrough
Step 1 – Create the free product in Shopify
- Go to your Shopify dashboard
- Click “Products”
- Click “Add product”
- Set the price to 0.00
- Disable the “Track quantity” box
- Uncheck the “This is a physical product” box
- Click “Save”
Step 2 – Install Fileflare

Step 3 – Upload your file to the app
- Go to the Fileflare app
- Go to the “Assets” page
- Click “Upload new asset”
- Upload the file
Step 4 – Attach the file to your free Shopify product that you created earlier
Now, click on the uploaded file in the app. It will load a page with a drop-down search box. This is what you will use to attach the file to your free Shopify product.
Once this is attached, then you are good to go! A download email will be sent to anyone who has purchased the free product.
Altogether, you can deliver the downloads using three methods:
- Via email – available on the free plan and paid plans
- The Thank You page (checkout page) – available on all paid plans
- The customer accounts – available on the Premium plan
Summary
The great thing about using this method is that you can use a post-purchase app to upsell paid products with an offer on the checkout page. It’s a great way to upsell current products.
Method 2 – Using an email app sign-up form
This method works by adding an email newsletter-style entry box on your site, and then the downloads are sent via this email app once someone signs up with their email address.
What do I need?
- An email app, such as Klaviyo or similar, that allows emails to be sent using sign-up forms
- A Shopify store
Video Walkthrough
Step 1 – Sign up for the email app
In this tutorial, we are using Klaviyo. They have a free plan for up to 250 saved emails and 500 emails sent per month. Other email apps will have different pricing brackets.
Step 2 – Go to “Sign-up forms” > click “Install Code Snippet”
What we need to do is install the snippet of code that allows the sign-up forms to work on your store.

Copy the code snippet.

Step 3 – Place the code in your store
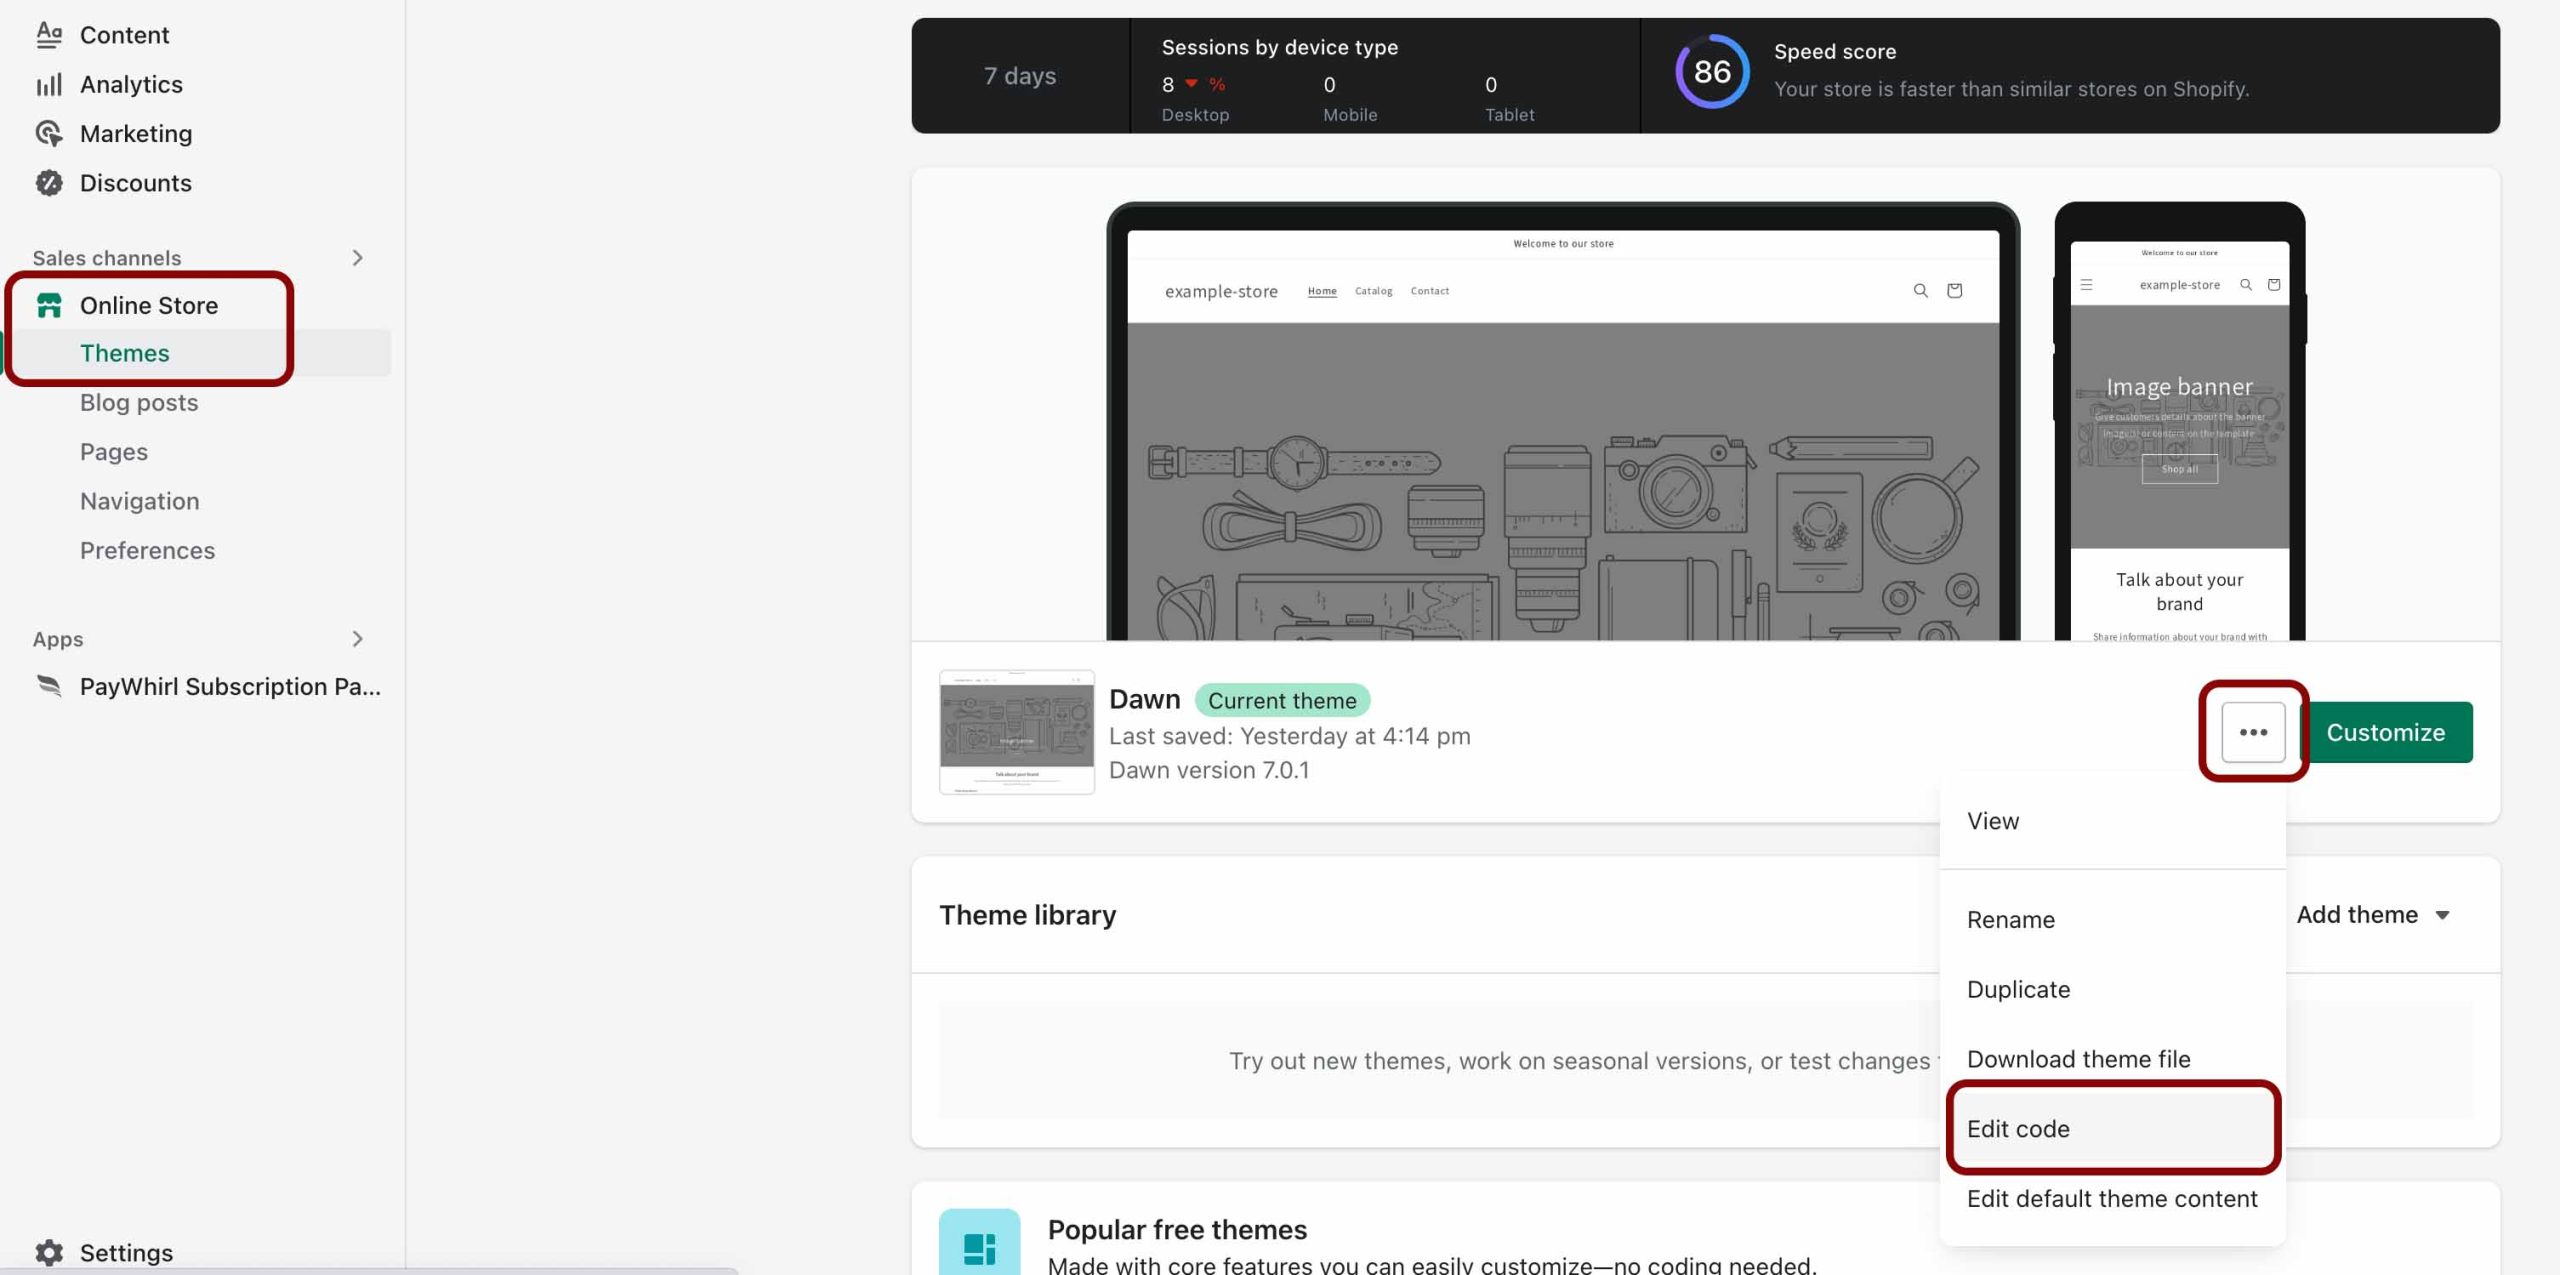
- Go to your Shopify store
- Go to “Online store” > click the 3 dots button > click “Edit code”
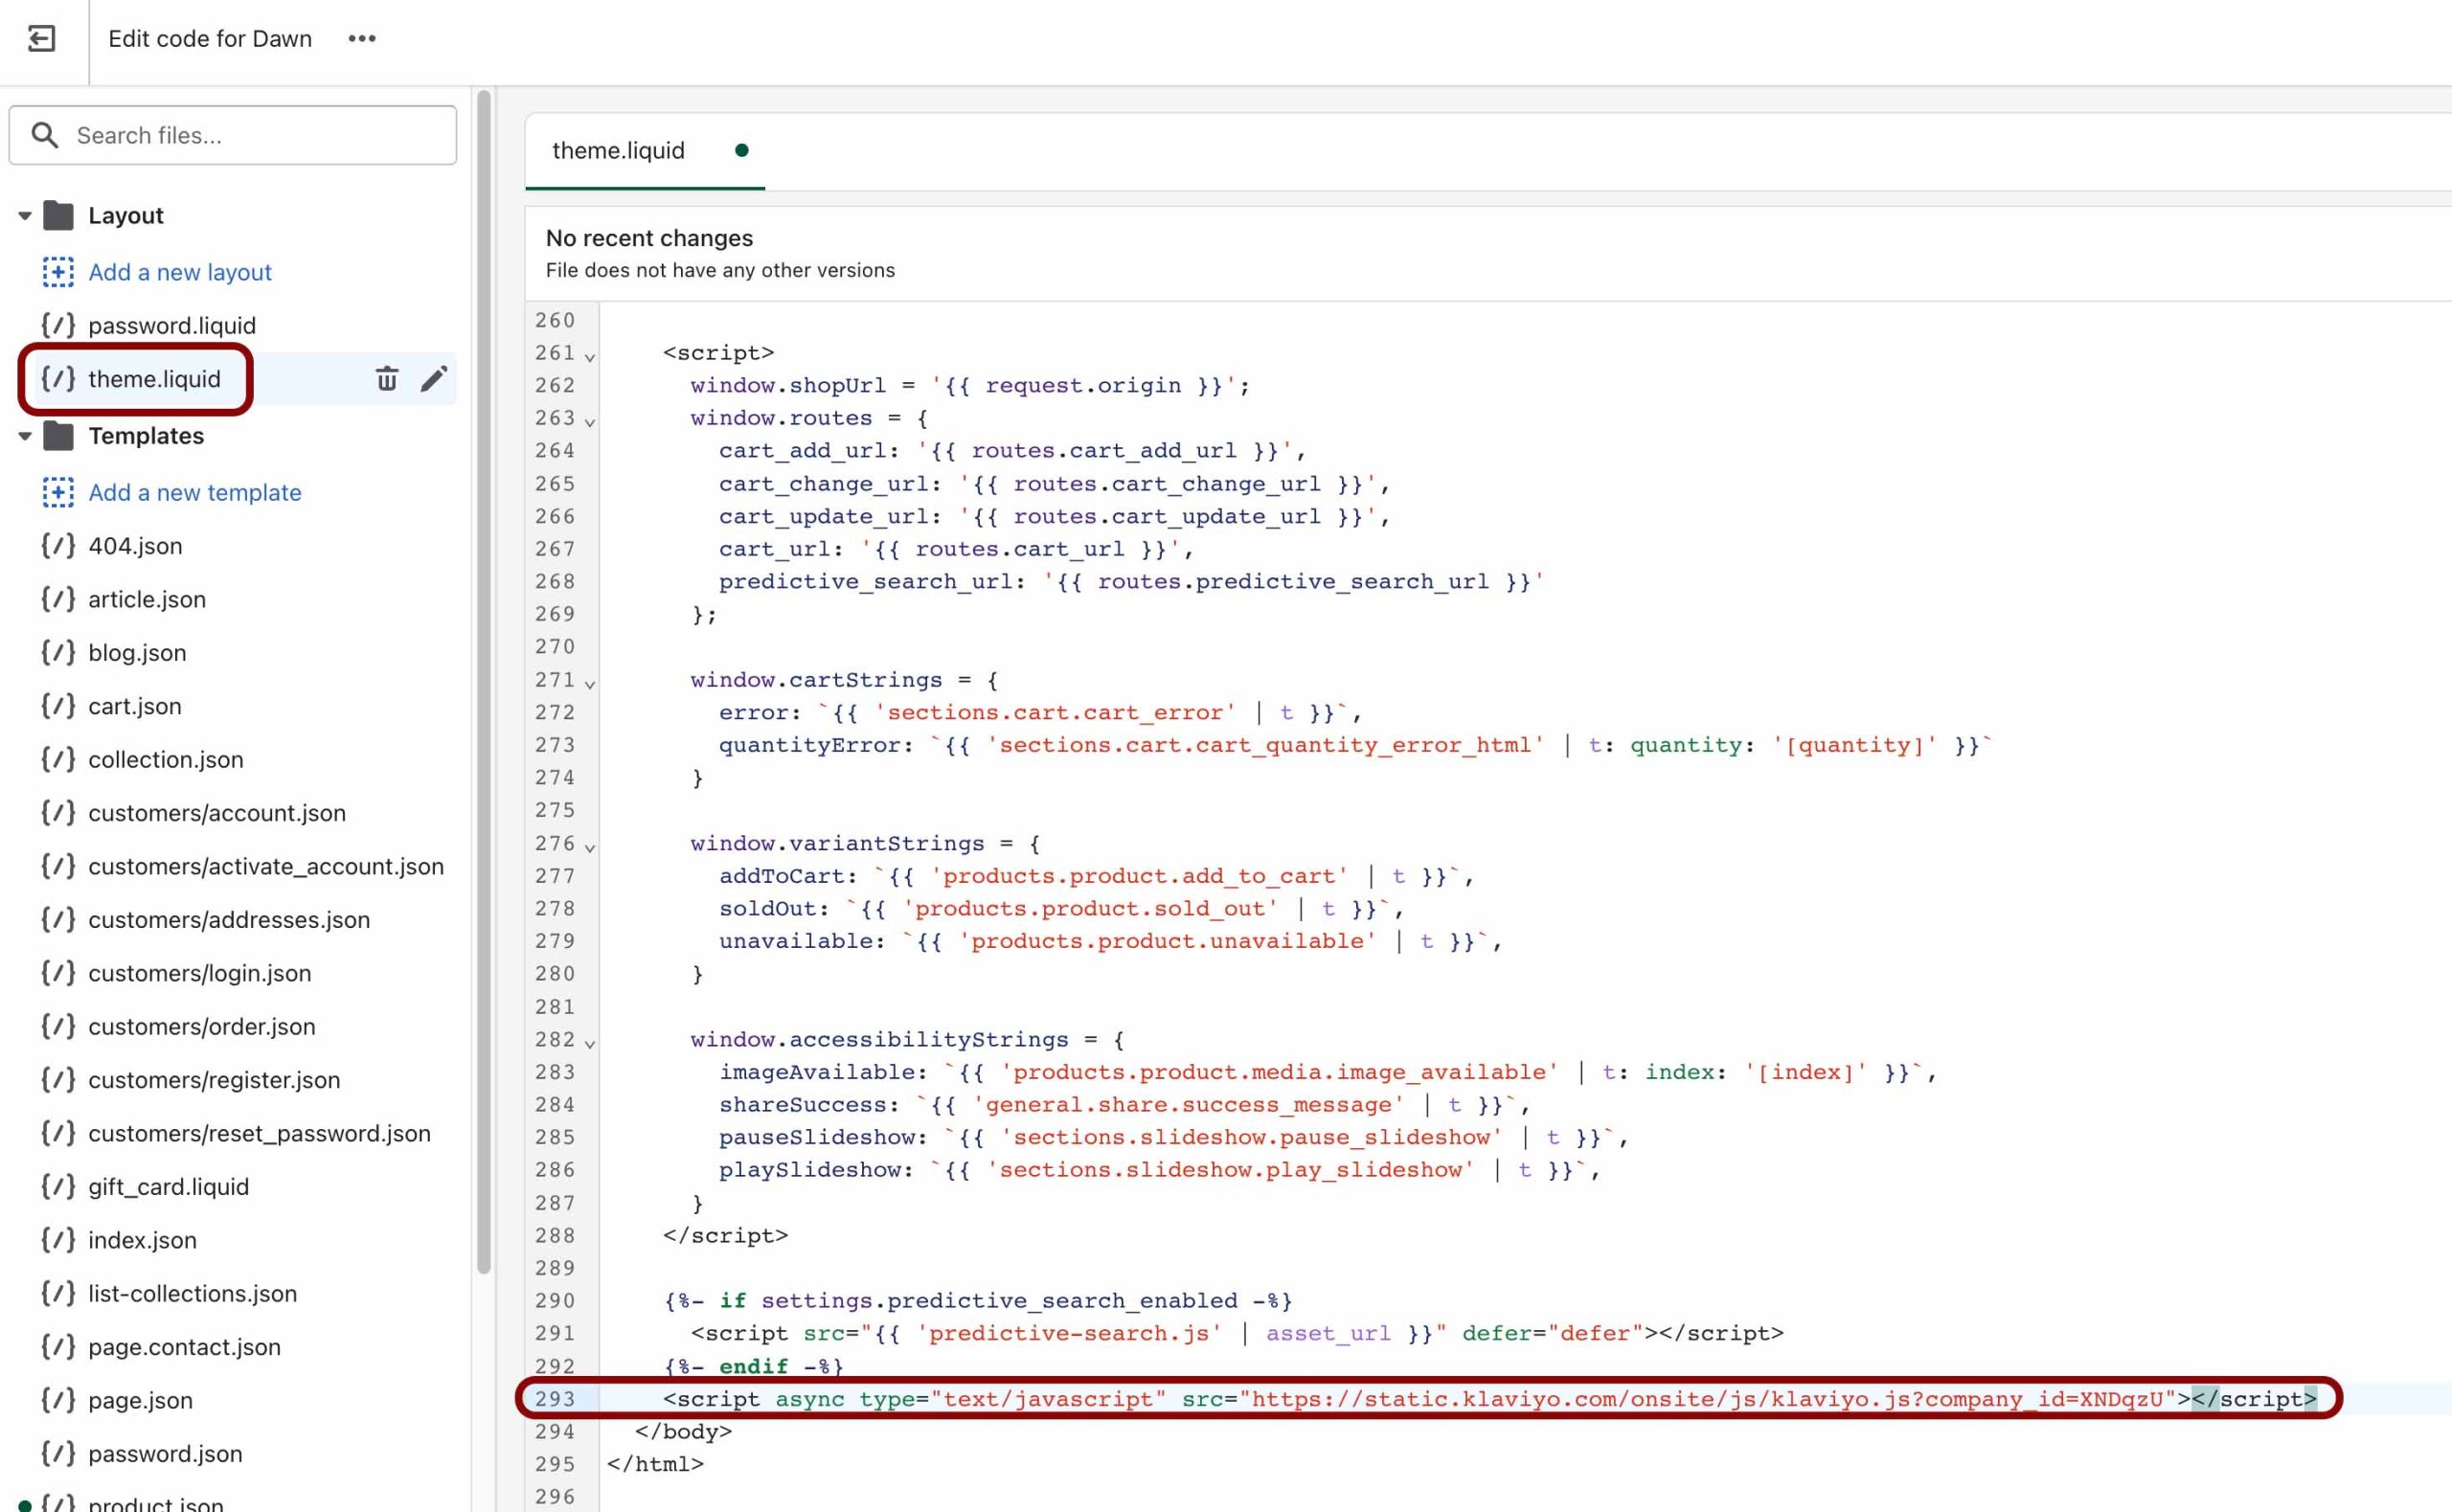
- Find your theme.liquid file
- Paste the code above the closing </body> tag
Note: this will place the code on all pages of your site. If you only want it on one page, just place the code on that single page.
Step 4 – Create an email list ready to collect emails
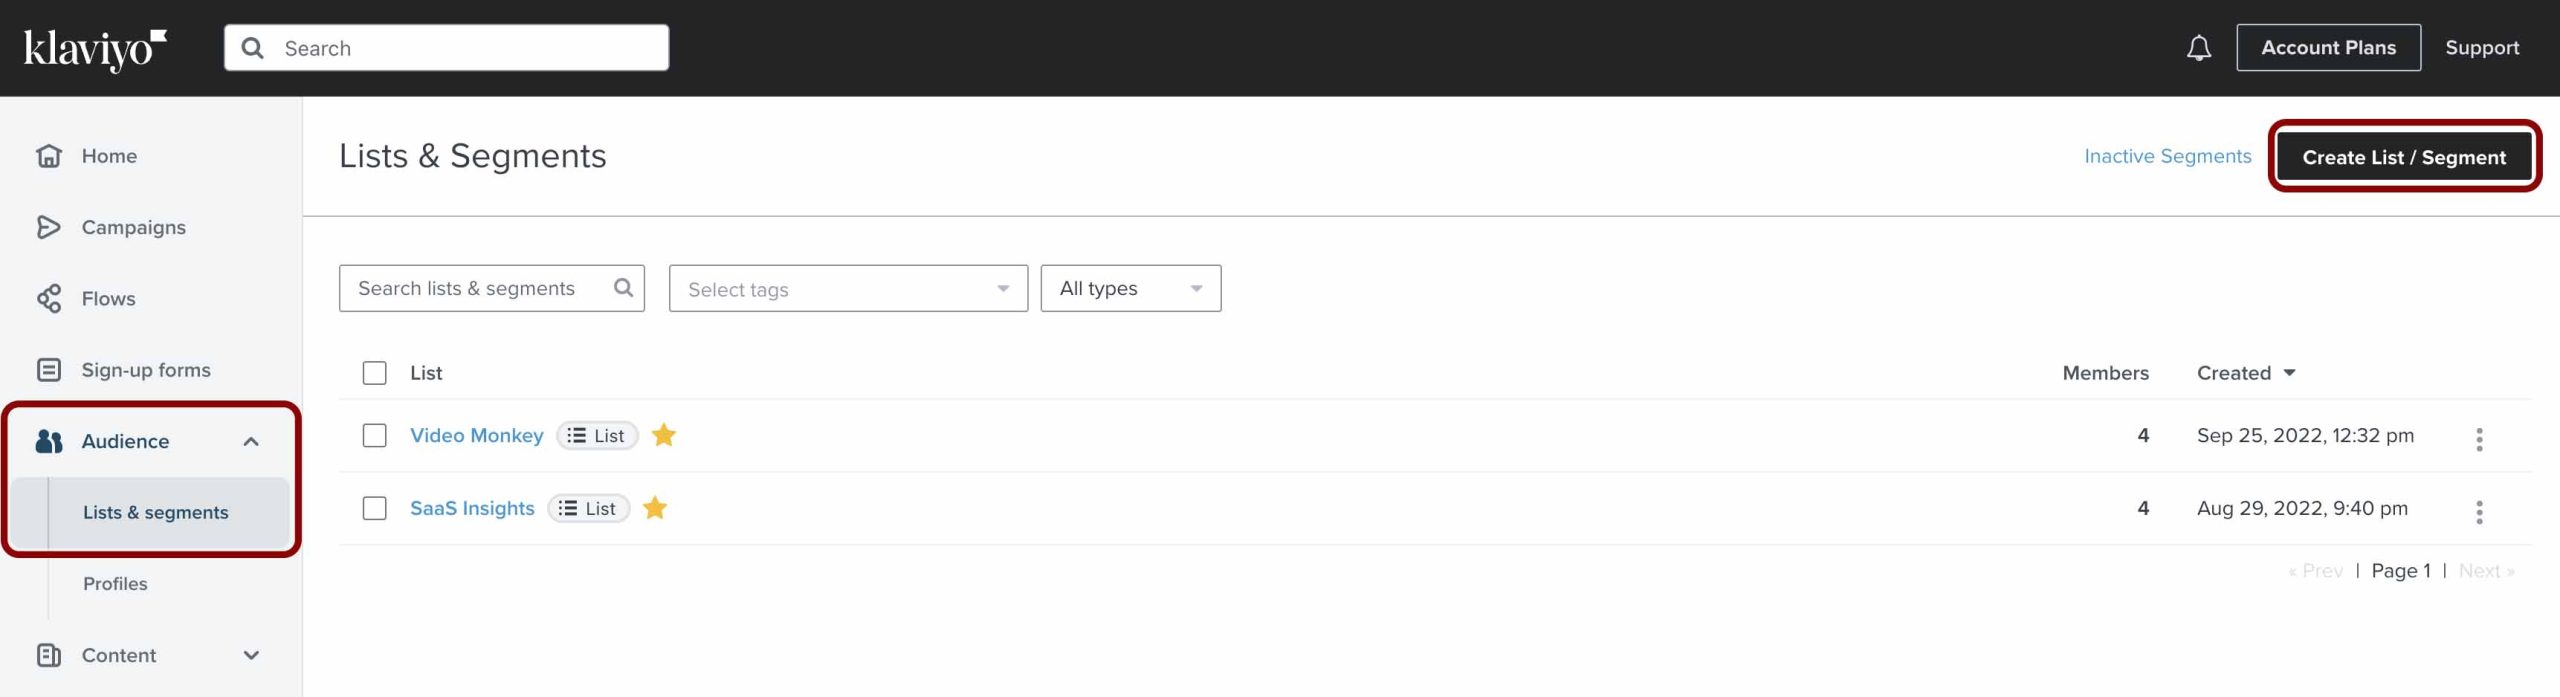
- Go back to Klaviyo
- Click “Audience” > “Lists & segments”
- Click the “Create List / Segment” button
- Follow the steps to finalise it and save it.
Step 5 – Create a signup form
Now you need to create the signup form.
- Click on “Sign-up forms”
- Click on “Create Signup Form”

Step 6 – Finalise the template
Simply just customise the template of the signup form in any way that suits you. Once you are done, publish it.
Step 7 – Paste the Signup form code onto your site
Now paste the signup form code onto your site wherever you want it to show.
Step 8 – Create the “Flow” in Klaviyo & add the download link to the new email template
Creating the flow will trigger an email to be sent to whoever signs up with their email address.
Summary
If you need any guidance or help, don’t hesitate to get in touch with us!